Tag Archive: Resist


These two tone cards are very simple and easy to make, they look like they are actually made up of 2 layers when in actual fact they are not! The illusion is created by the use of sponging and stamping on different portions of your card front. I used bright vibrant card blanks for this project to create a stark contrast when I sponged over the top of the clear embossing resist.

The beauty of this idea is that you don’t actually have to sponge at all because the two tone effect will take place all by itself by the use of embossing powders!

Try it yourself and see!

    Materials Used:

  • Clear Embossing Powder
  • Embossing Ink Pad
  • Embossing Heat Tool
  • Scrap Paper
  • Black Pigment Ink Pad (I used Brilliance)
  • Cosmetic Sponges (or stippling brush)
  • Dye Ink Pads in colour of your choice – I used Art Print Brown (Memories) and Peeled Paint, Dusty Rose Distress Ink Pads (Ranger)
  • Colour Card Blanks in bright colours (I used blue, orange and yellow)
  • Embellishments (optional)
  • Rubber Stamps Used:

  • Large Word Background (Judikins)

How To Create:

1. Take your scrap piece of paper and tear it in half, this will be your mask for your embossing on your card blank.

2. Place torn mask over your card blank front so that half of it is covered up. See sample scans for example.

3. Ink your rubber stamp up with the clear embossing stamp, and stamp over the top of your card front – you want to overlap the design slightly on the scrap paper. Continue stamping until the entire exposed card area is stamped.

4. Pour on clear embossing powder and heat to melt.

5. Once embossing powder is cooled, take your sponge and ink it up with your dye inkpad. Rub the sponge over the front of your card blank – there are 2 ways to do this; you can either keep the mask in place and only sponge over the top of the stamped area OR you can sponge over the entire front area of your card blank – theres no rules here and its entirely up to you!

6. Once you are happy with how the front of your card looks, take your scrap paper mask and cover up the area you have already stamped on to protect it.

7. Next stamp on the unstamped area with the black inkpad – you can clear emboss if you wish or not – I did both to test out the different contrasts.

8. Your card is complete, you may add embellishments if you wish.

More Two Tone Cards

Joseph Coat is a Brayering Technique which I think Ive fallen in love with! I love how it can be adapted to use on either gloss or matt card, I even tried it on vellum too! The overall effects are so different depending on the surface you stamp on. Experiment and see for yourself! Be careful you dont get hooked!

Supplies Used

* White Card Stock: Matt and Gloss
* Vellum
* Assorted Colour Card Blanks
* Clear Embossing Powder (Stamps n Stuff)
* Heat Tool
* Gold and Silver Leaf Pen (Krylon)
* Versamark Inkpad (Tsukineko)
* Memories Black Permanent Inkpad (Stewart Superior)
* Memories Hunter Green Permanent Inkpad (Stewart Superior)
* Rainbow Dye Inkpad: Kaliedacolour Desert Heat and Blue Breeze (Clearsnap)
* Adironrack Rainbow Dye Inkpad: Winter Sky (Ranger) (available from: Innovative Stamp Creations)
* Big and Juicy Rainbow Inkpad: Waterfall (Ranger) (available from: Innovative Stamp Creations)
* Tea Dye Distress Dye Inkpad (Ranger) (available from: Innovative Stamp Creations)
* Soft Kitchen Towelling
* Dye Inkpads in: Green and Magenta (Embossing Arts)
* Rubber Brayer
* Paper Trimmer
* Bone Folding Tool
* Double Sided Tape
* Gold Peel Off Corner Stickers (Stampendous)

All Rubber Stamps Used By Innovative Stamp Creations

Joseph Coat Brayering Technique Directions
For reference: I used Gloss Card Stock to create the Dragonfly card seen below. Matt card stock for the Leaf Nature Card seen opposite (left). And Vellum to create the Blue Art card above right. I recommend trying this technique using all 3 different papers so you too can compare the results!

1. Take your sheet of gloss (or matt or vellum) card stock, and brayer over the entire surface using a Rainbow or dye inkpad. Let dry.

2. Stamp image over the top of the brayered background using a clear versamark inkpad (or embossing inkpad), sprinkle over clear embossing powder and heat to melt image.

3. Next brayer over the entire surface of both the brayered background and stamped image using a dark inkpad: Black is good for this. I used ‘Winter Sky’ Adironrak inkpad for this because it was dark and was the shade I was looking for. (I wanted it to be dark, but not black; kinda offblack)

4. Gently rub the stamped image using a soft kitchen towel tissue to remove the ink from the embossed areas of the image itself.

Notice how the brayered card creates a kinda cool reverse resist brayered effect 🙂

Your card is complete.

I just love playing with my Posh Impressions inks!! They make you feel like an artist without having to work to hard as the ink and water does all the work for you! These cards where created using the ‘faux bleach’ technique – instead of bleach you clear emboss then paint over inks to achieve a resist effect.

Read on for details…

Supplies Used

* Cream Or Tan Card Stock
* Versamark Inkpad (Tsunekio)
* Clear And Gold Embossing Powder (Stamps n Stuff)
* Card Blanks
* Gold Brads
* Letter Stickers (Stampendous)
* Gold Leafing Pen (Krylon)
* Posh Impressions Rainbow Inks: Earthtones Set
* Paint Brush
* Cup of Water
* Artists Paint Palette

Rubber Stamps Used

* Gloria Angel (Stampendous)
* Leaves (Personal Impressions)

Directions

There are two ways to create these kind of cards;

The first method involves embossing your main image and using the inks to create a kind of ‘wash’ effect. The other way involves using a waterproof inkpad (memories) to create a colourful background without the resist effect.

The directions below are for the ‘faux bleach resist effect’:

1. Take cream or tan card stock and stamp your main image using a versamark inkpad. Emboss immediately using clear embossing powder. Allow to cool.

2. Crumple the card you have just embossed into a very tight ball, squeeze, then open it up again.

3. Place a drop of each of the colours of the inks you are going to use in an artists paint palette.

4. Using a paint brush soak the card stock completely with water.

5. Next dip your brush into one of the ink colours and paint it directly onto the water soaked card stock in a light sweeping movement. Don’t think too hard about this as you want the water to do all the work and blending.

6. Wash your brush out and apply a different colour of ink to the card.

7. Continue until you have created a background wash of colours. Heat set to dry.

I used: Butterscotch, Tan, Burgundy and Green to create my backgrounds shown on this page.

Notice how the crumples in the paper create and add a texture to the ink and how the embossed image creates a resist to the ink. You may notice the ink seeps under the embossed image in some areas, this is normal.

You can experiment adding less or more ink or water to create deeper and lighter shades and hues.

8. Once dry tear round the image leaving a generous border. 9. Apply Versamark inkpad along the torn edges and emboss immediately using gold embossing powder to create a rustic midas background.

10. Create a background of ink wash as described above to layer your art onto; only this time do not crumple the card stock. Apply more water after you have applied the inks to create a lighter wash. Heat set to dry.

11. Apply gold brads to the four corners of the leaf wash background.

12. Affix ink wash background to card stock with double sided tape.

13. Affix main image to the front of the card.

14. Add lettering stickers to spell out LEAVES.

Your ink wash card is complete.

More Ink Wash Background Cards

Card On Left is Stamped With Memories Art Print Brown, Card on Right is Uncrumpled and embossed with clear on tan card stock

This technique is similar to the Textured Glue Resist Background Technique also featured in Techniques Zone.

This time we are using cheap PVA Glue to create a resist area on our actual rubber stamped art so that when we smoosh colour over the top our stamped images are left untouched by the background colour! Its a cool effect and with a little experimentation you can create different effects and styles…

What You Need:

* Coloured Matt Card Stock – I used cream and yellow
* White PVA Glue
* Embossing Heat Gun
* Memories Inkpad in: Black, Hunter Green and Art Print Brown
* Post It Notes
* Scissors
* Pigment Inkpads in various colours (I used Colorbox Paint Pad Brights)
* Kitchen Tissue (or toilet paper)
* Paint Brush

Rubber Stamps Used:
* Harlequin Background (Hero Arts)
* Winged Face in Clock (Stampers Anonymous)
* Time Word (Time To Stamp)
* Large Clock Face (Non Sequitur)
* Pocket Watch (Gotcha Images)
* Small Watch (Angel Art Stamps)
* Life Is Fun (Hero Arts)
* Time Is Eternity Background (Non Sequitur)

Directions

1. Repeat stamp Harlequin background onto card stock with art print brown memories inkpad.

2. Repeat stamp time is eternity word background with hunter green over the top.

3. Stamp face with wings stamp using black memories as shown in the scan above.

4. Now stamp the large pocket watch with black as shown, and stamp again onto post it note paper and cut out to create a mask of the image and place over the stamped image on your card.

5. Over stamp the large clock face so it overlaps the pocket watch mask as shown in the scan.

6. Stamp the small watch and life is fun word to finish.

7. Heat set your card with your embossing heat tool to make sure your inks are properly dry.

8. Take your paint brush and carefully paint over the top of all your stamped images. You want a nice smooth thin coat of glue. You can also add accent to the card background as well if you wish – this is optional.

9. Heat set the glue to dry it.

10. Take 2-3 different pigment inkpads and smoosh them over your card stock. I used pink, blue and lilac. Do not be afraid of applying pressure and getting a good firm smooshing of ink.

11. Take your kitchen/toilet paper towelling and gently wipe across the areas where your glue is on the stamped images. As you do this you will notice that you are lifting off the pigment ink from the stamped images and create a resist effect. The pale colour of the card stock will be visable only where the actual glue is.

12. Heat set.

Your glue resist stamping art is complete!

After playing around with the Spray Starch Background Technique I got to wondering what else I could use the starch for …like you do.

So decided to have a little dabble.

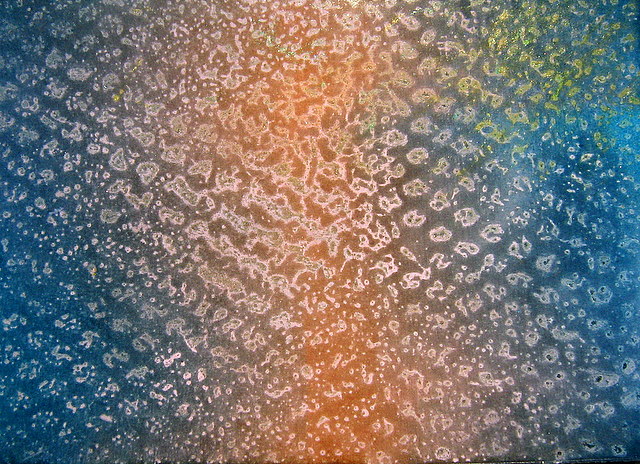
I made a couple of resist type backgrounds using the spray starch as a resist medium, I had some plastic netting which I used to make a stencil screen to spray the starch through on glossy card.

Next I heat set the starch using the heat gun and then used a brayer to roll over the top of the card with a rainbow dye inkpad. As you can see from the results below, the spray starch does a good job as a resisting medium 🙂

The sample below was created using the aerosol varity of Spray Starch (Dylon brand)

This sample was created using Wiz Spray Starch which is a non aerosol brand 0f liquid starch in a trigger action spray bottle.

I like the resist better with this background as it seems to be a lot stronger and textured: